Diorama Stylized Realism
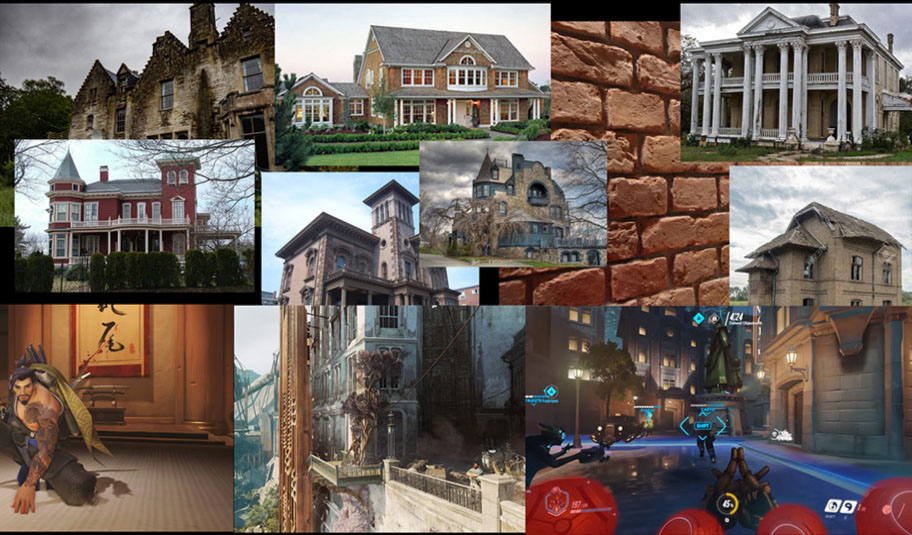
This challenge was to make a piece of environment art which looked both real and stylized. Think of it as trying to blend a bit of the aesthetic of Call of Duty with more of the look of Overwatch. First thing to do when tackling any art project is to grab reference. Above are some of the images I collected to aid me in this task.
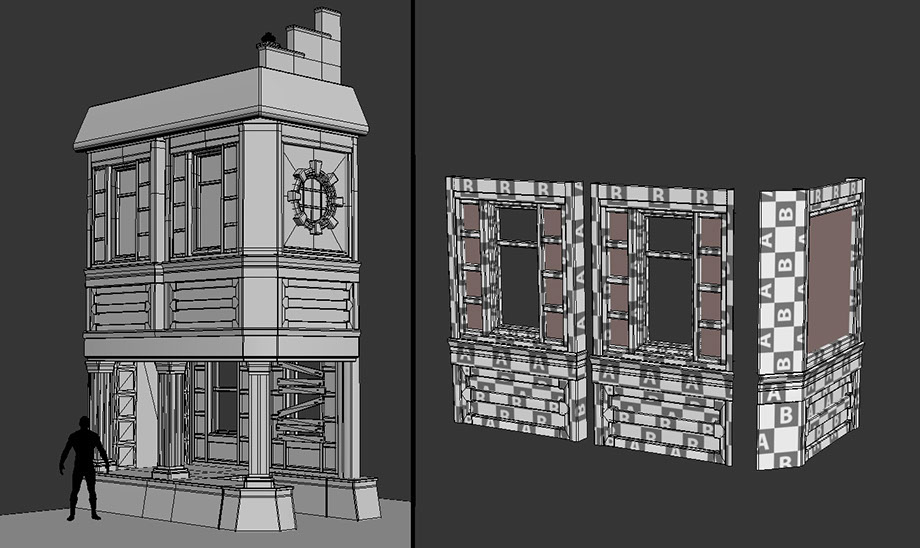
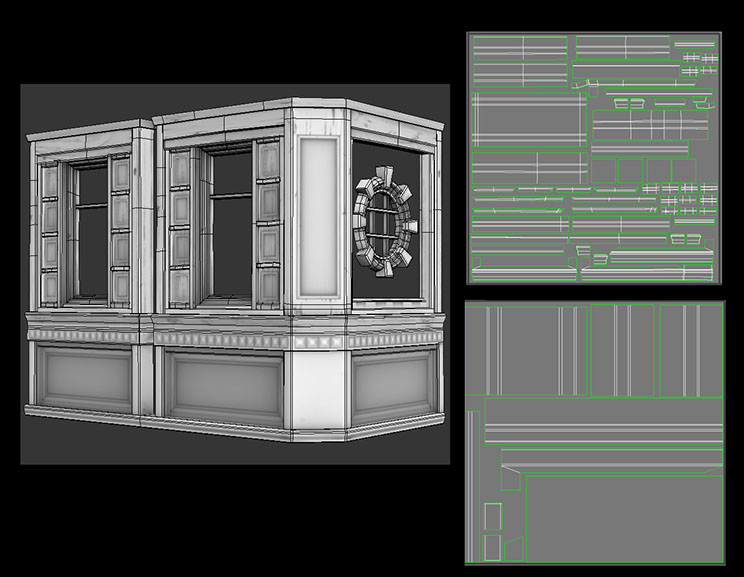
Next I model out my building based on my reference hunt. When modeling I am thinking about the look of course, but also a system, usually a tile set and the grid. Sometimes you have to follow rules which are already set and other times you develop them for others.
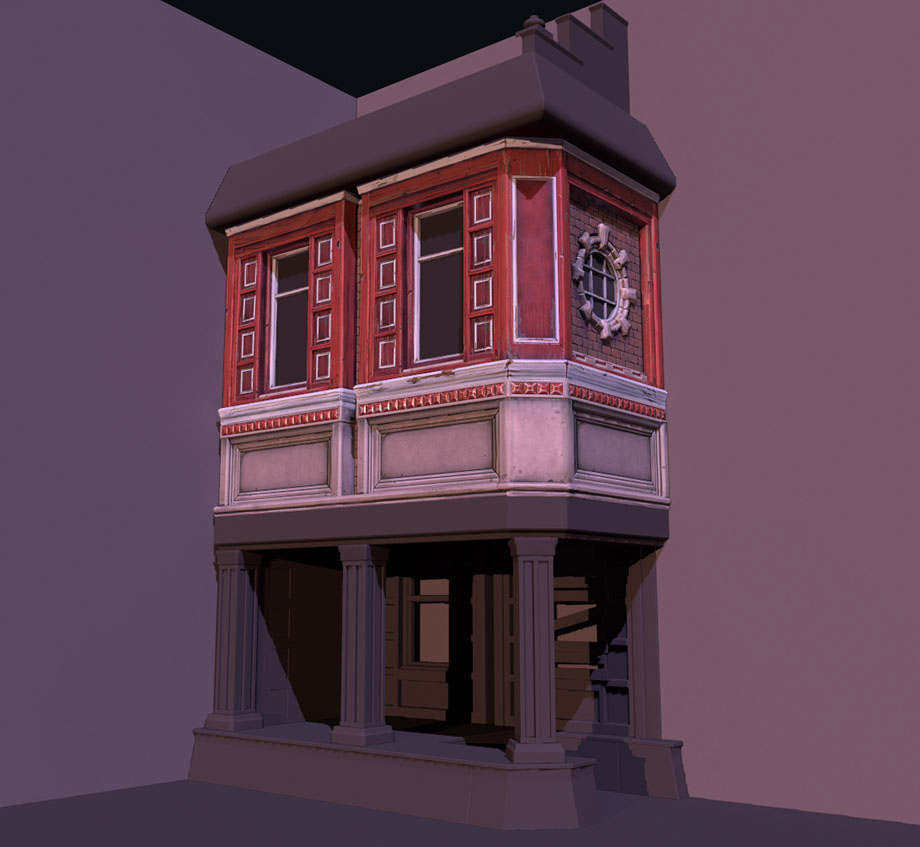
Another important consideration is scale. I used a character mesh to help me find a balance of slightly exaggerated proportions, while still keeping it believable .
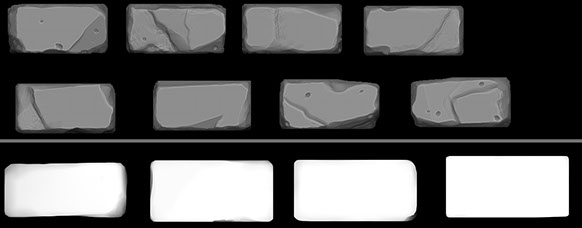
I know one of my construction materials for the house will be brick. Using photos or megascans/photogrammetry will make it harder to get that stylized look. Instead, I modeled a set of unique bricks then captured height maps from those sculpts
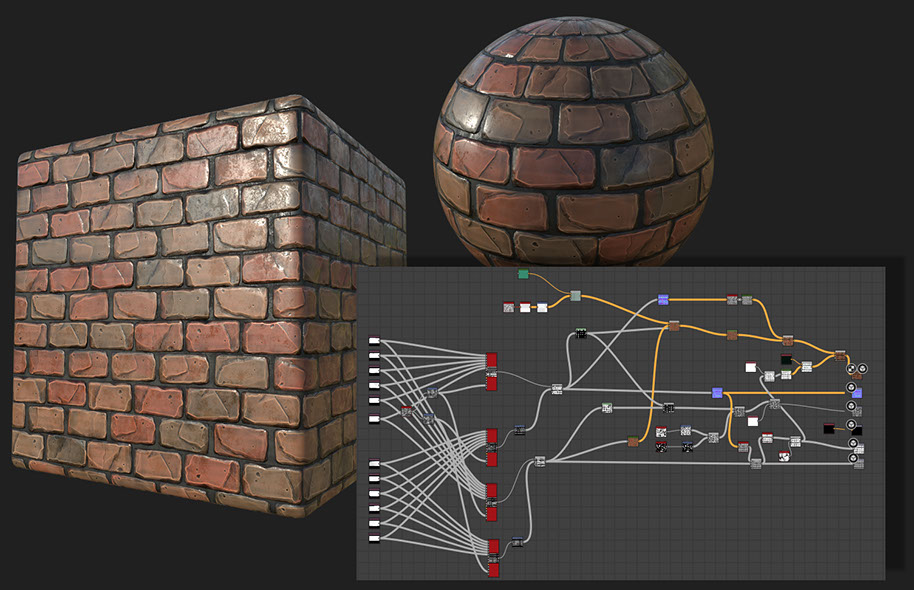
Then I brought those height map captures from Zbrush into Substance Designer and used them to build a tiling brick material. I really enjoy working in this program, it felt very intuitive and I plan to use it more in the future.
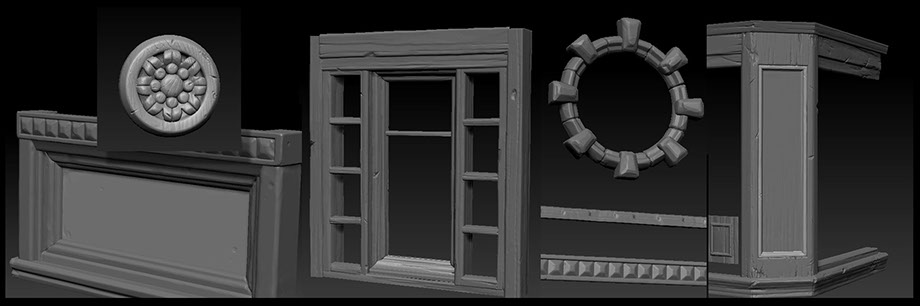
I used Zbrush on most parts, not only is this really fun, but it adds a lot of sculpted detail that will become very helpful when it is time to paint.
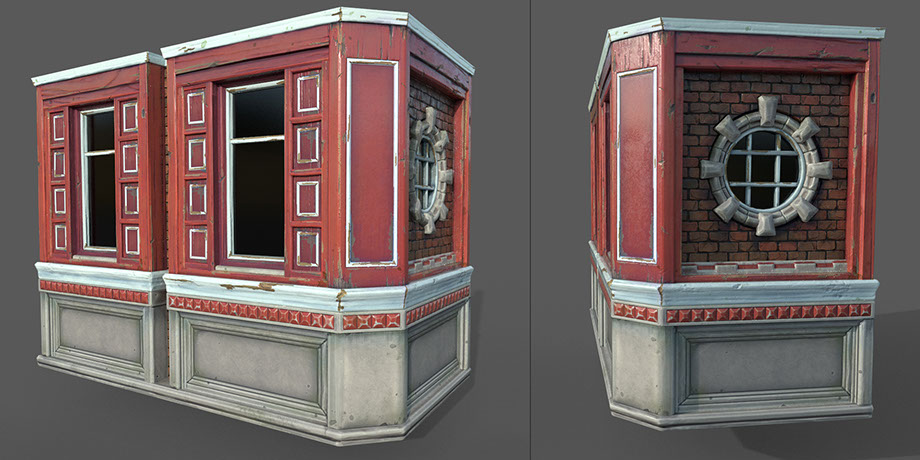
Not all, but most of the professional projects I have been a part of an asset like this would be stripped/trim textured. I thought about going that route in the beginning, but decided to treat it more like a hand sculpted asset, similar to a prop. At the same time most of the object's UVs are set up so they could be transitioned to strips.
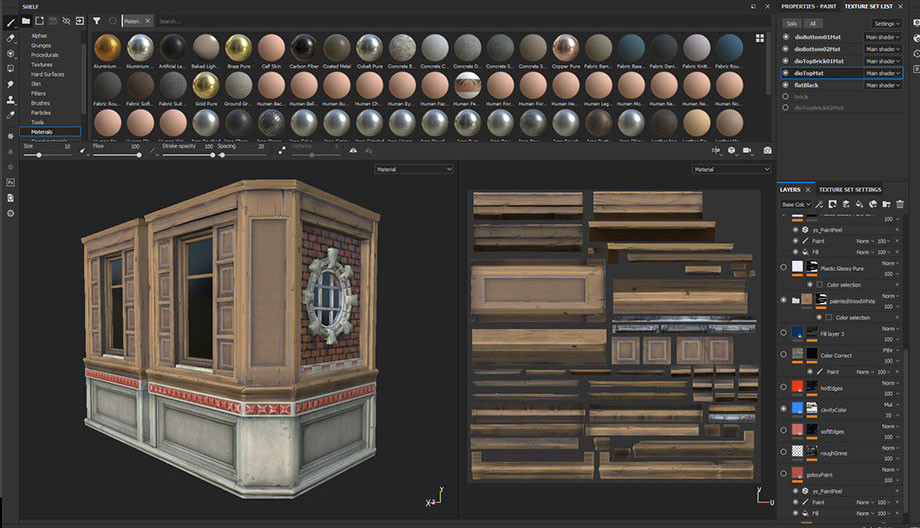
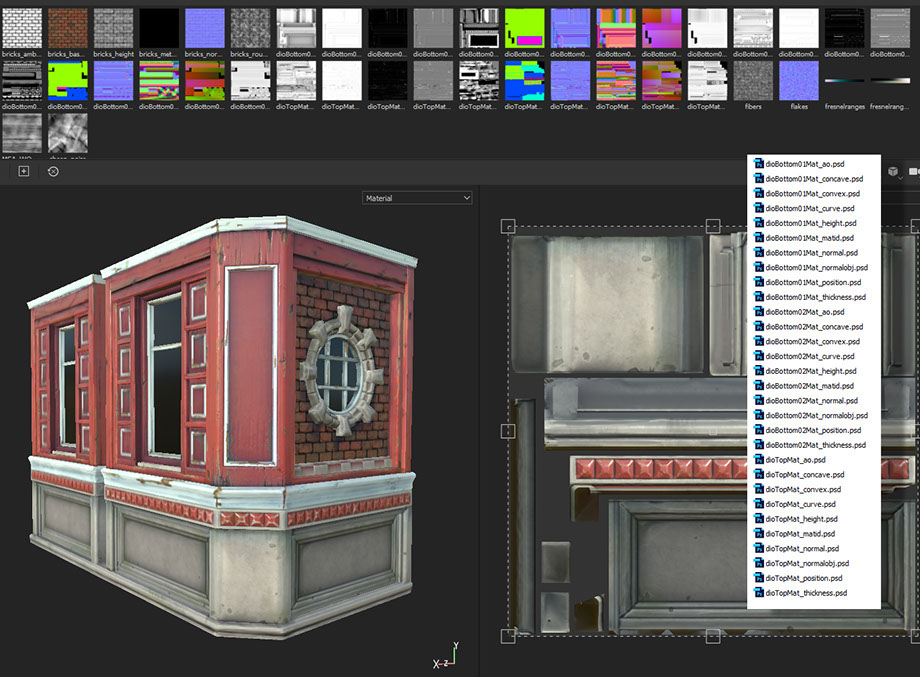
After baking all my maps in Marmoset, its time to finish up in Substance Painter. This is where the prep and modeling time really pays off. After I finish In Painter, I bring the textures into Photoshop for a bit of final tweaking (mostly cavity mask work)
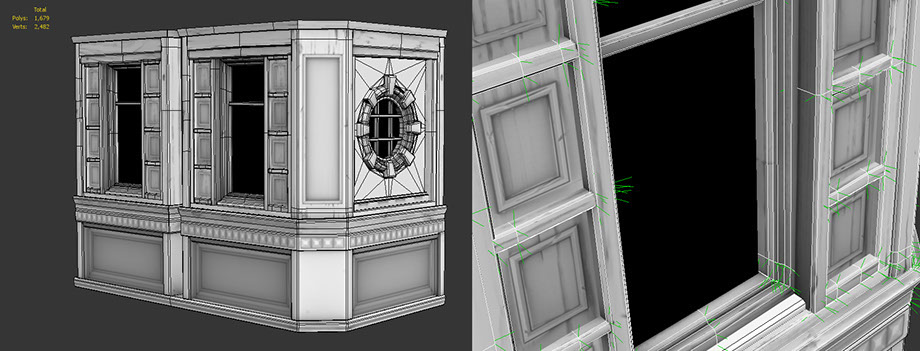
I should mention that I constructed the low poly model with support for vertex normal direction. This cost a bit extra due to the chamfers you have to add, but yields amazing results. If needed this mesh could have been made using the old school smoothing group/split vertex technique.
In conclusion, this little piece was a blast to work on and I look forward to making more things like it in the future.